
Hey guys, if you wish to learn how to Add Fonts To Photoshop, you have two options. The purpose of the font determines the option you select.
Adobe Creative Cloud, for example, lets you make your fonts available across all of Adobe’s products. Fonts can also be installed locally and then used across all apps.
[lwptoc]
Add Font to Photoshop Windows 10
I will explain both methods and offer some interesting tips on how to find different fonts online.
Add A Font to Photoshop Through Adobe Creative Cloud
You can download and add fonts directly to Photoshop using the Creative Cloud feature. If you have an Adobe account; as a result, you’ll be able to use your new fonts across all of your Adobe software and devices.
1. First of all, open Adobe Creative Cloud on your computer. Adobe app subscriptions like Photoshop are required as well. However, Adobe Creative Cloud or an older version of Photoshop is not needed; proceed to the next section instead. If you’ve an Adobe Creative Cloud subscription, you can access fonts for both commercial and personal use for free.

2. Tap the Italic F logo in the top right corner of the interface once you’re inside Adobe Creative Cloud. When the page has loaded, go to Adobe Fonts and then to Browse All Fonts.

3. A browser window will open in which you can look for fonts and font families using the built-in search engine. If you like a font, you can see all the fonts in the family by clicking View Family. When you click on Activate Fonts on the following page, all of the fonts in that family will be enabled.
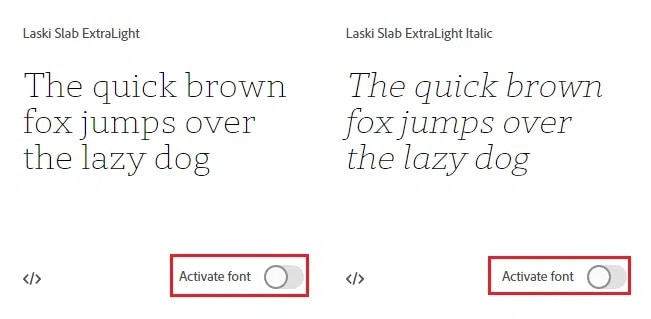
4. Alternatively, please scroll down and click on the slider for each font in that family to manually add them.
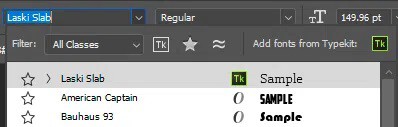
5. When you activate a font, the message Font Activation Successful will appear. Next, open Photoshop and look for your new fonts in the font list when using the text tool.
Add a Font to Photoshop Without Adobe Creative Cloud
The first step in using Adobe Creative Cloud fonts in Photoshop is finding the fonts online. Following the steps listed below will allow you to download and install Fonts for Photoshop easily.
To begin, be sure to read the licenses of any fonts you download from the internet carefully. Even if you download a font for free, you can only use it for your personal use. Font designers frequently have a commercial use license that must be purchased.
Google Fonts is an excellent place to look for free fonts for commercial use. Well, all of the Google fonts on this page are free & open source. DaFont, on the other hand, is the best place to find a more extensive selection of fonts for free, personal use.
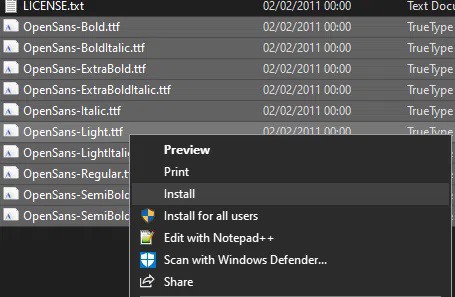
- In most cases, once you download a font, you will receive an a.zip file. So, first, extract your fonts to a new folder, then select all of the fonts you want to install. Then, right-tap and choose Install.
Notably, the procedure is the same on a Mac. Double-click on the extracted font files to begin the Font Book installation process.
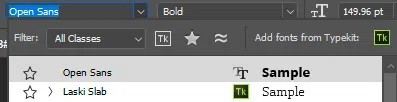
- You should be able to find your font in Photoshop once it has been installed. If you still can not see it, restart Photoshop. The benefit of installing fonts this way will appear in any other word processing apps you use, including Microsoft Office.
Additionally, a drawback of this approach is that you will only use fonts installed on your computer. Using them on other devices will require that you reinstall them.
How To Manage Your Fonts
Fonts can be managed via Adobe Creative Cloud or locally on your PC or Mac. It could be helpful if you want to remove unused fonts or verify that a font has been correctly installed.
How To Manage Adobe Creative Cloud Fonts
1. Open Adobe Creative Cloud.
2. Tap the italic F icon in the top right.
3. Click Adobe Fonts.
4. Tap the name of each font to switch it on or off.
Note that these fonts will merely work in Adobe apps that you have an active subscription for.
How To Manage Windows 10 Fonts
1. Press the Windows Key.
2. Type Fonts.
3. Click Font Settings.
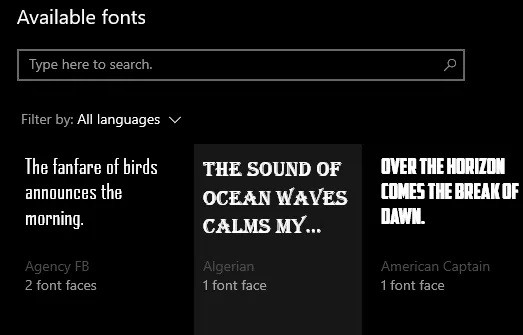
A comprehensive list of all installed Free Fonts for Photoshop can be found here. Click on a font to see a preview, change the default settings, or uninstall it. If you don’t see a font, you probably installed it incorrectly.
How To Manage Mac Fonts:
1. Open Launchpad
2. Search for Font Book
3. Tap Font Book in the search results to open it.
All installed fonts can be viewed, previewed, and uninstalled in Font Book. If you can’t see a recently installed font, it’s possible that you didn’t install it correctly.
ALSO SEE: Windows Update Stuck
Final Words
I hope this guide has helped you add Free Fonts for Photoshop or remove fonts from your system. Well, if you need any additional assistance about how to add a Font to Photoshop, please get in touch with me by leaving a comment below.