While surfing the internet, you may come across several roadblocks that prevent you from reaping the benefits of a good internet connection. Slow internet speed, inability to understand website requirements, and so on are examples. The inability to connect to the internet may indicate a DNS problem, as shown below with “DNS server Not Responding” or “Server DNS Address couldn’t be found.” When the Domain Name Server (DNS) cannot resolve the website IP address, the error occurs.
Causes of the problem:
A DNS cache stores the information required for domain name resolution, essentially storing called and resolved addresses. Once you browse the Internet, you leave a record of your visit and behavior on each site, saved in cookies or JavaScript apps. Their goal is to curate your preferences and personalize content for you each time you visit the website.
These are saved in the DNS cache. A DNS cache stores the information required for domain name resolution, essentially storing called and resolved addresses. Essentially, it allows your computer to access those websites more efficiently. Here are some reasons behind the occurrence of DNS Server Not Responding Error:
1. Network Issues: It is often not less than a poor internet connection issue that is to blame for such an inconvenience, mistakenly attributed to DNS. In this case, DNS is not to blame; therefore, before blaming DNS errors, go to your “Network and Sharing Center” then run the troubleshooter. It will identify and resolve many common connectivity issues and assist you in narrowing down the source of the problem.
2. Common DNS Issues: TCP/IP: TCP/IP software, or the Dynamic Host Configuration Protocol (DHCP), which assigns IP addresses to devices & handles DNS server addresses, is one of the most common causes of DNS errors. Simply restarting your computer will resolve these issues (you can even use a TCP/IP utility program to fix your settings). Finally, if both the Wi-Fi router and the device in question are DHCP enabled, there will be no problem. As a result, in case one of them is not DHCP allowed, connection issues may arise.
3. Internet Provider DNS Issue: Many internet providers provide DNS server addresses to their users. If the users haven’t changed their DNS server on purpose, this is more likely to be the source of the problem. When a provider’s server is overloaded or simply malfunctioning, it can result in a “DNS server not responding” error or another DNS issue.
4. Problems with Anti-Virus Software: Unfortunately, both viruses and anti-virus software can cause DNS errors. When the anti-virus database is updated, errors can occur, leading the program to believe your computer is infected when it is not. As a result, when attempting to connect, you may receive “DNS server not responding” errors. You can see if this is the issue by temporarily disabling your anti-virus software. If your connectivity problem resolves, the case was most likely caused by the program. Changing programs or simply downloading the most recent update can fix the problem.
5. Modem or Router Issues: “DNS Server not responding” appears to be a problematic error to resolve, but minor issues with your modem or router can also cause such a problem. Simply turning off the device & restarting it after some time can temporarily solve the problem. If there is a problem with the modem or router that does not go away, it should be replaced.
[lwptoc]
Fix: DNS Server Not Responding Error
Here are some best solutions to how you can fix the issue concerning DNS Server.
Method 1: Disable IPv6
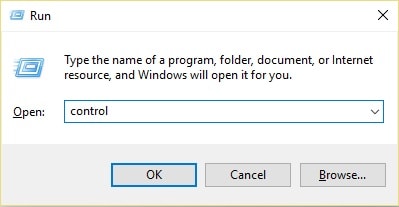
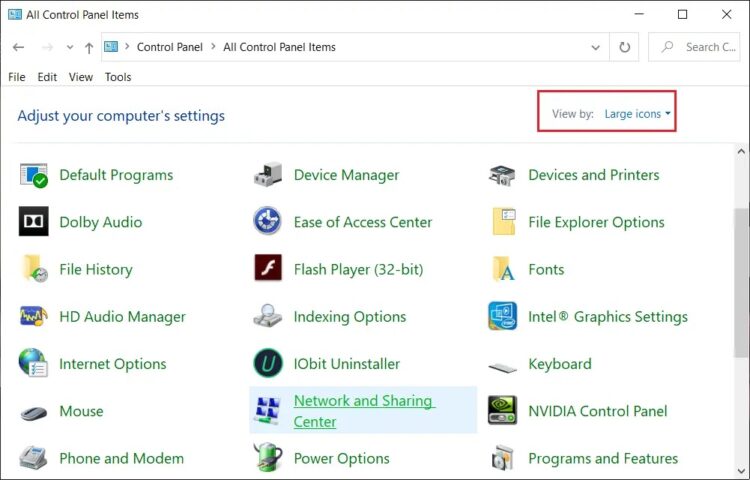
1. Press the Windows logo key + R simultaneously on your keyboard, then type Control and press Enter.
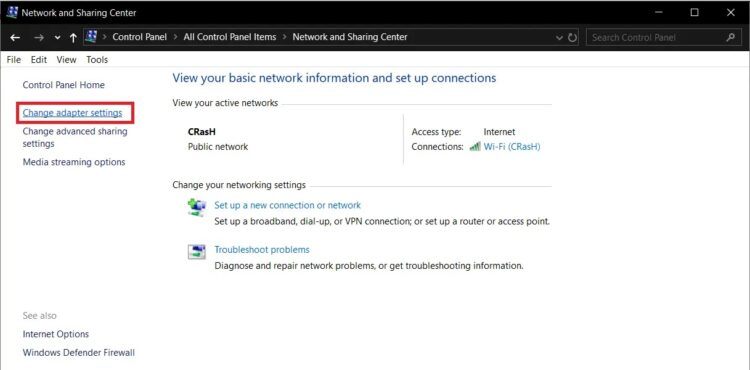
2. Choose Network and Sharing Center from the list of Large Icons.

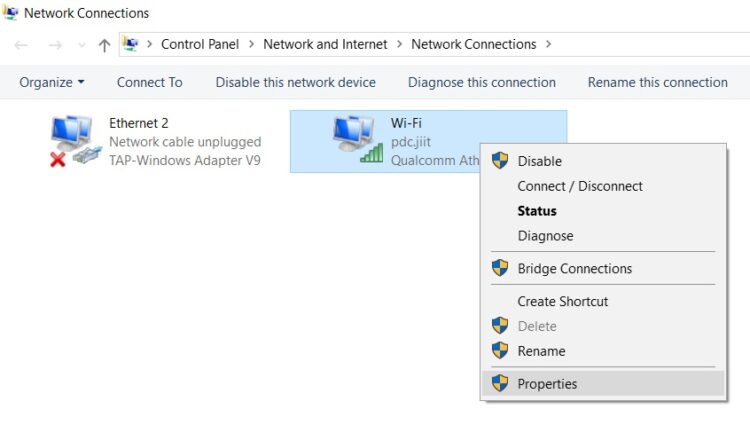
3. Select Change adapter settings from the drop-down menu.
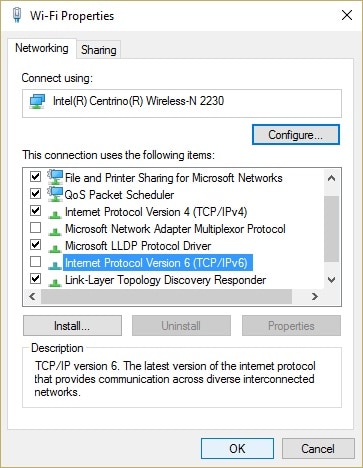
4. Right-tap on Local Area Connection, Ethernet, or Wi-Fi, depending on your operating system, and select Properties.

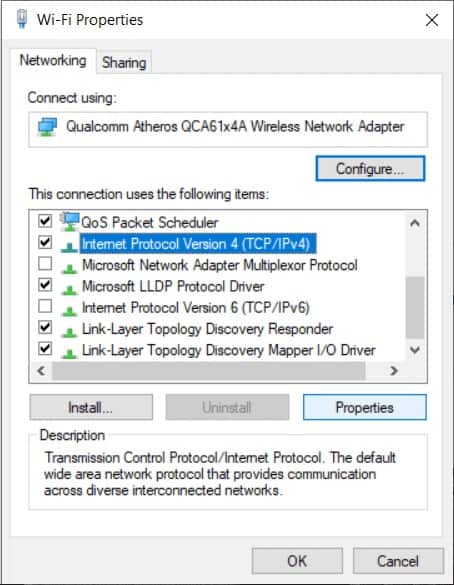
5. Uncheck “Internet Protocol Version 6 (TCP/IPv6)” and then click OK.
Check to see if you could resolve the DNS Server Not Responding Error; if not, proceed.
Method 2: Flush your DNS cache and reset IP
Apart from ensuring proper connectivity, you may want to flush your DNS cache for personal and security reasons. Every time you visit a website, information is stored in the form of cookies and Javascript apps. Allow you to curate content based on your previous internet activities, indicating that you may want the same content when you open the webs. Sometimes you may want to keep your identity hidden, and blocking cookies and Javascript may not be enough, leaving flushing the DNS as a last resort.
Steps to flush DNS:
1. In Windows Search, type cmd, then right-click on Command Prompt in the search results and select “Run as administrator.”
2. Afterward, in the Command Prompt Window, type the following commands and press Enter after each one:
ipconfig /flushdns
ipconfig /registered
ipconfig /release
ipconfig /renew
netsh Winsock reset
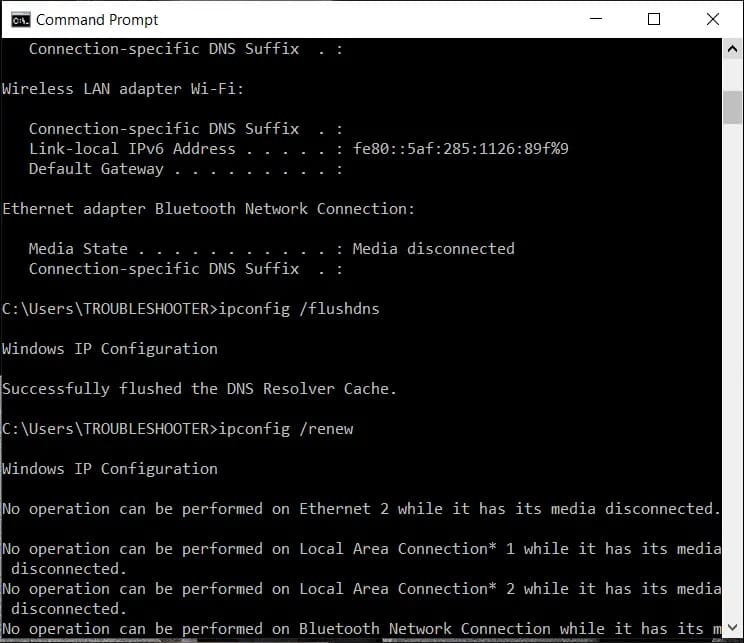
3. Reboot your computer & check whether this solution helps in fixing the problem or not.
Method 3: Disable your Antivirus
As previously discussed, the antivirus software on your computer could be the root cause of the problem you have accessing a website via the internet. The problem can be solved by temporarily disabling the software. If it works, you might need to try a different antivirus program. Installing a third-party app to prevent viruses from infiltrating the computer system can be problematic, and thus disabling it may help resolve the issue.
Method 4: Correct your DNS Server Address
The issue might arise from your incorrect DNS server address, so here is what you can do to fix the problem:
1. On your keyboard, press the Windows logo key + R at the same time to open the Run box.
2. Enter Control into the text box and press Enter.

3. Select Network and Sharing Center from the list of Large Icons.
4. Select Change adapter settings from the drop-down menu.

5. Right-tap on Local Area Connection, Ethernet, or Wi-Fi, depending on your operating system, and select Properties.
6. Choose Internet Protocol Version 4 (TCP/IPv4), followed by Properties.
7. Check the boxes next to “Obtain an IP address automatically” and “Use the following DNS server addresses.”
Then use the following settings:
Preferred DNS Server: 8.8.8.8
Alternate DNS Server: 8.8.4.4
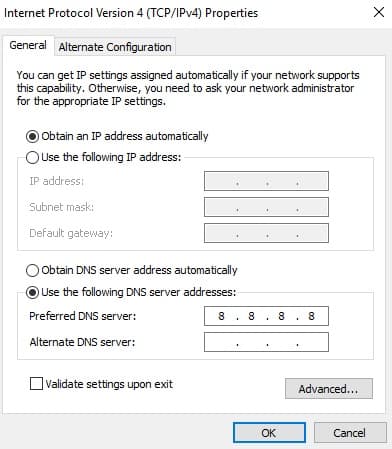
8. Tap Internet Protocol Version6 (TCP/IPv6) then Properties.
9. Now, tick on “Obtain an IP address automatically” and “Obtain DNS server address automatically,” then tap OK.
10. Now, reboot your computer, then check whether the issue has been resolved or not.
Method 5: Update Network Adapter Drivers
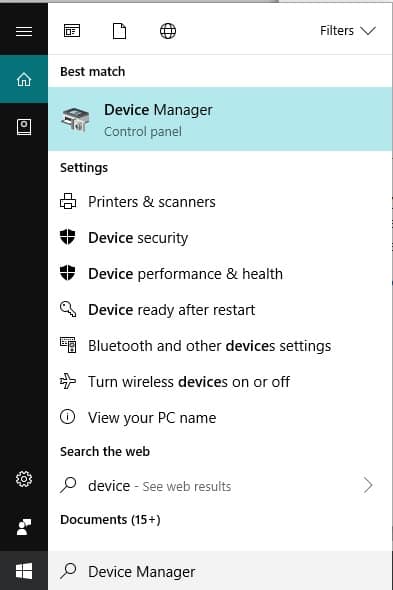
1. In Windows Search, type Device Manager and then tap on the top search result.
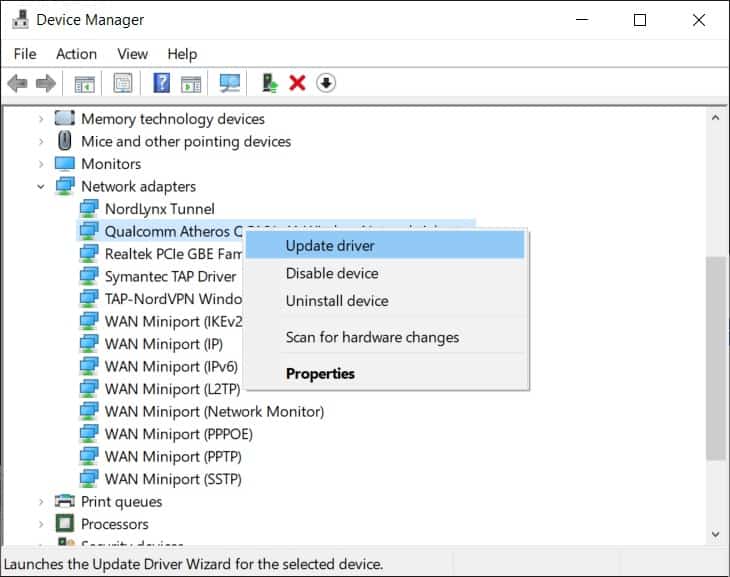
2. Expand Network Adapters, then right-tap your Wi-Fi device (such as Intel) and choose Update Drivers.
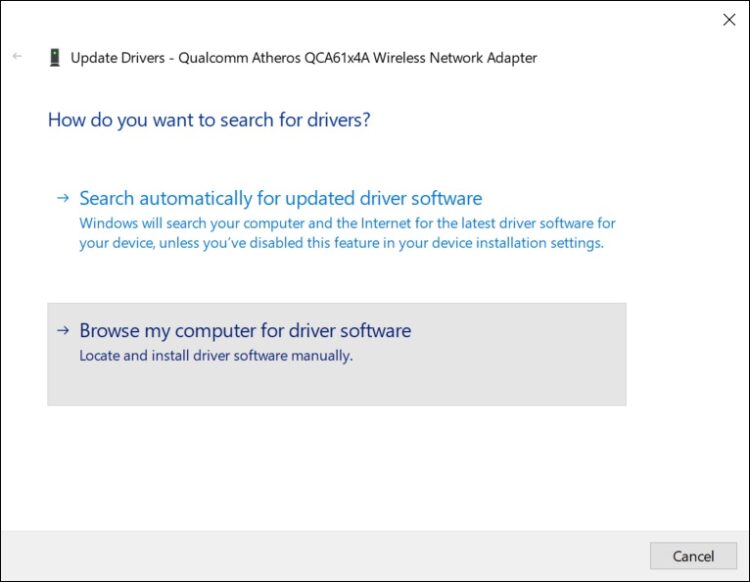
3. Afterward, select “Browse my computer for driver software.”
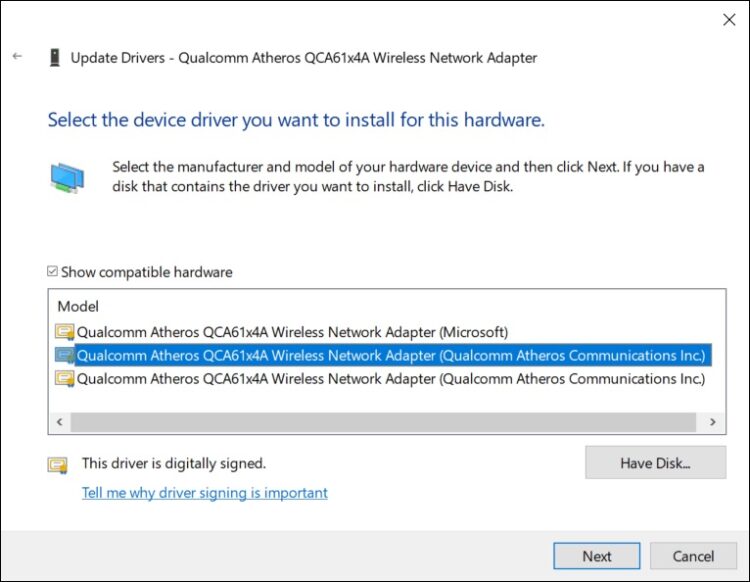
4. Choose “Let me choose from a list of device drivers on my computer.”
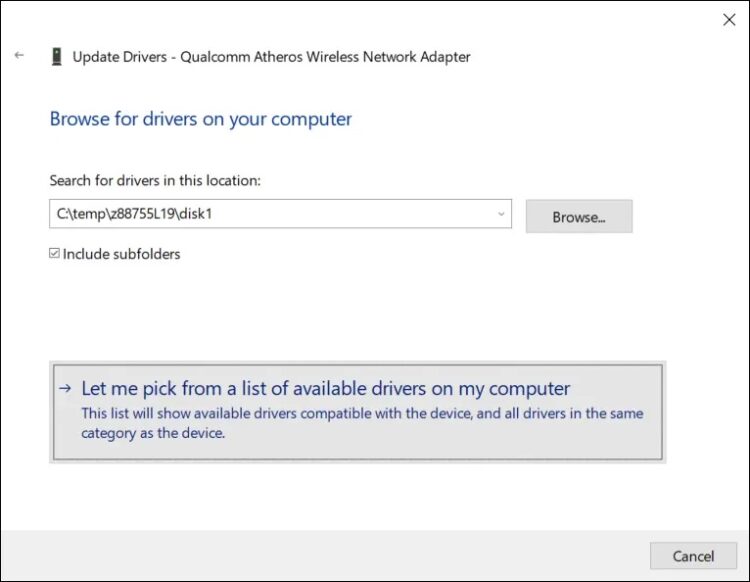
5. Attempt to update drivers from the versions listed.
6. If the above did not work, then go to the manufacturer’s website to update drivers:
https://downloadcenter.intel.com/
7. Reboot to apply changes.
Method 6: Reset your Router
Sometimes the Wi-Fi router will not work due to minor technological issues or simply because of some damage or a high data load, causing disruptions in its proper operation. All you need to restart the router by unplugging it from the power supply and then reconnecting it, or if the router has an “On/Off” button, press it and then turn it back on. Check whether restarting help or hinders the resolution of the problem.
You can even reset the router by opening its configuration web page and selecting the “Reset” option or pressing the reset button for approximately 10 seconds. It will also reset the password.
As a result, by employing the methods outlined above, you can resolve connectivity issues without the need for technical expertise. These steps are straightforward, and they can assist you in learning more about your computer and fixing any problems that arise as a result of a specific cause. If the problem persists after exhausting all other options, you should contact your Internet service provider so that he can investigate and resolve the technical issues.
Method 7: Disable Secondary Connections
If your computer system is connected to more than one network connection, disable the others while leaving only one active.
1. Open the Start menu, then type “Network Connections” into the search box.
2. Select your connection type, such as Ethernet, in the Network and Internet Settings window, then click Change adapter options.

3. Right-click on the other connection (other than your active Wifi or Ethernet connection) and choose “Disable” from the drop-down menu. It should be applied to all secondary connections.
4. After saving the changes, restart your computer and check to see if the website you wanted to access is now accessible.