
Increasing your online privacy, security, and surfing speed are possible by changing your computer’s default DNS settings. Parental control over what your children see is another benefit of changing your DNS server. It is possible to unblock stuff that is otherwise unavailable in your country by modifying your DNS settings. Using a Windows 10 or Mac computer, here’s how to Change your DNS Server and which DNS addresses you should use to access the Internet.
What Is DNS?
DNS – Domain Name System is the internet’s phone book. Most of the time, people use a domain name like google.com to navigate a website. Using a DNS, your web browser will be able to decipher that information.
Furthermore, an IP address is a string of characters separated by periods & comas. For instance, one IP address for Google.com is http://173.194.203.106/. However, a DNS address is merely one part of the equation these days. So, you will not always be capable of accessing a website using its IP address anymore.
Your internet service provider (like Comcast, Verizon, & Spectrum) will give you a default DNS. However, you can always modify your Windows 10 PC or Mac DNS setting.
How to Change Your DNS Server Settings on a Windows 10
To change DNS server Windows 10 computer, go to Settings > Network & Internet > Change Adapter Settings. Then right-tap a connection and choose Properties > IPv4 > Properties. Finally, choose to Use the following DNS server address.
1. At first, open the Windows Start Menu. You can do this by tapping the button with the Windows logo in the bottom-left corner of your screen.
2. Then tap Settings. It is the gear-shaped icon just above the power button.
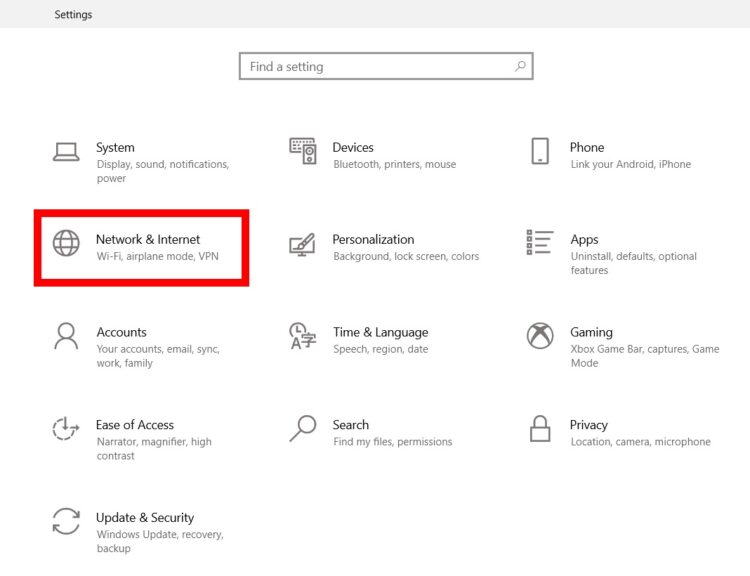
3. Next, choose Network & Internet.
4. Afterward, tap Change adapter options. You’ll see this under Advanced network settings.
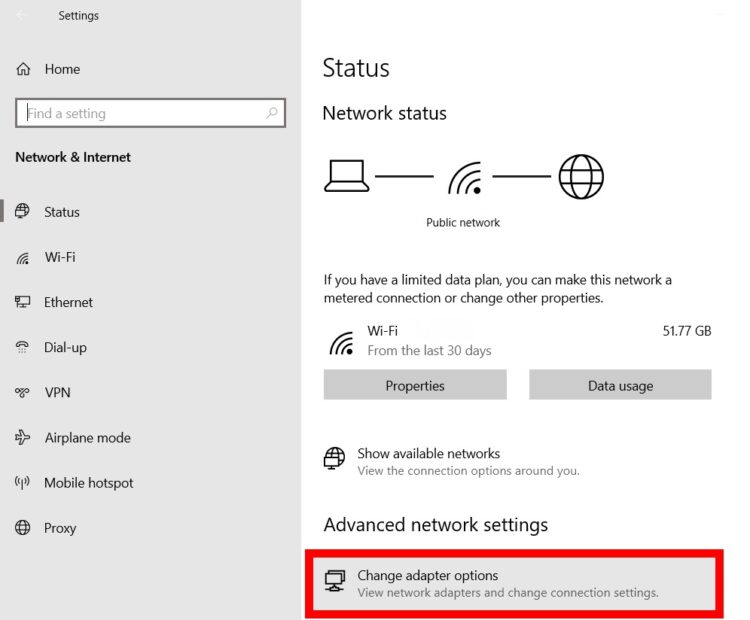
Note: In case you do not see this option, click Status in the left sidebar. If you do not see Status in the left sidebar, expand the Settings window or make the window full screen.
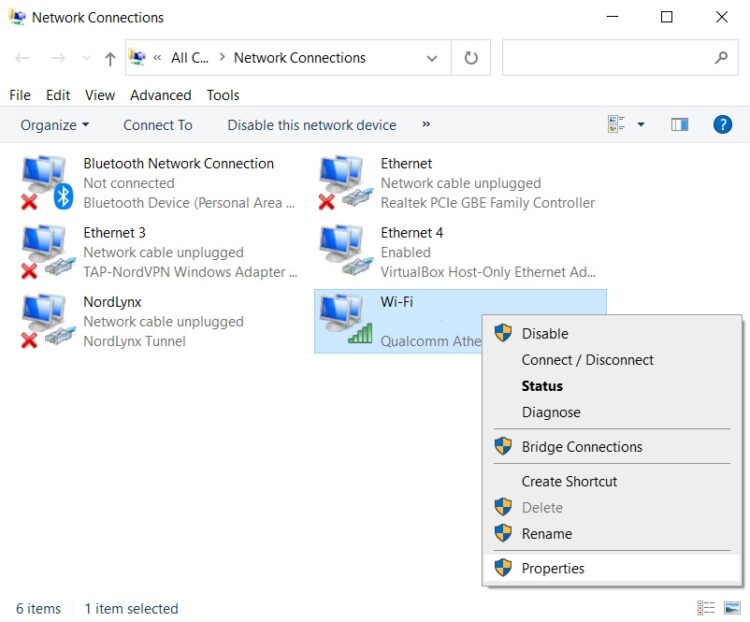
5. Right-tap on the connection you want to change the DNS server for. If you’re connected via WiFi, choose that. If you are connected via Ethernet, choose that. You’ll know which connections you are currently using because they will have green bars, while the connections that are not in use will have a red X.
6. Then choose Properties. It will be the last option in the pop-up menu.
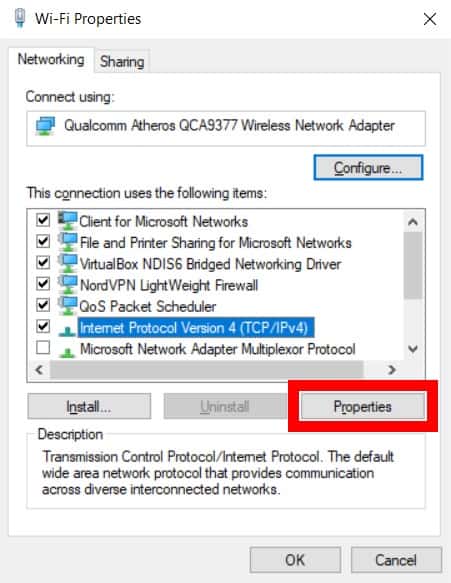
7. Next, choose Internet Protocol Version 4 (TCP/IPv4). In case you don’t see this option, use your mouse to scroll up and down the selection.
8. Then tap Properties.
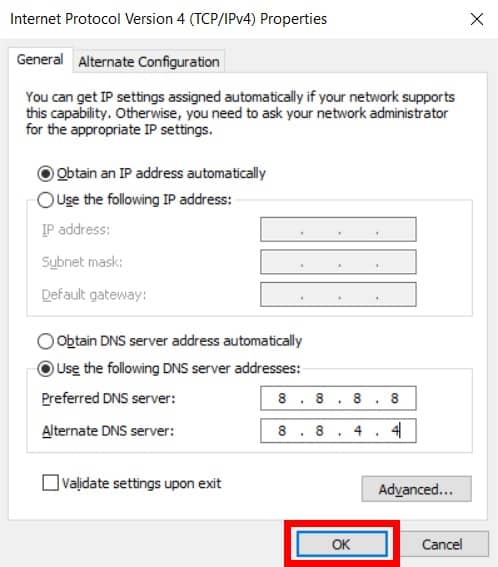
9. Next, tap the radius next to Use the following DNS server addresses. You’ll see it in the bottom half of the window.
10. Then, enter a new DNS address. You’ll even want to add a secondary DNS server address in the following line.
Note: If you do not know what to add, see the section on which DNS server addresses to use below.
11. Finally, tap OK. You will notice this at the bottom of the window. Your modifications won’t go into effect until you tap OK.
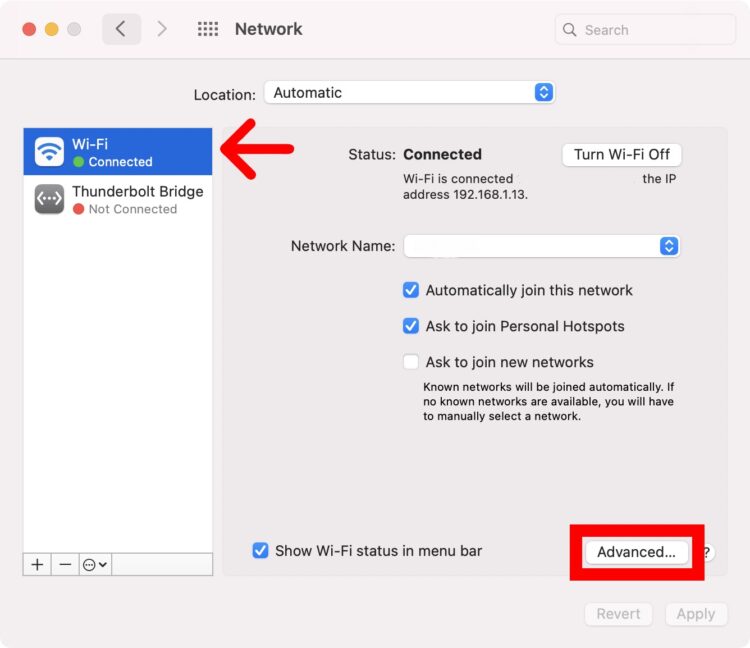
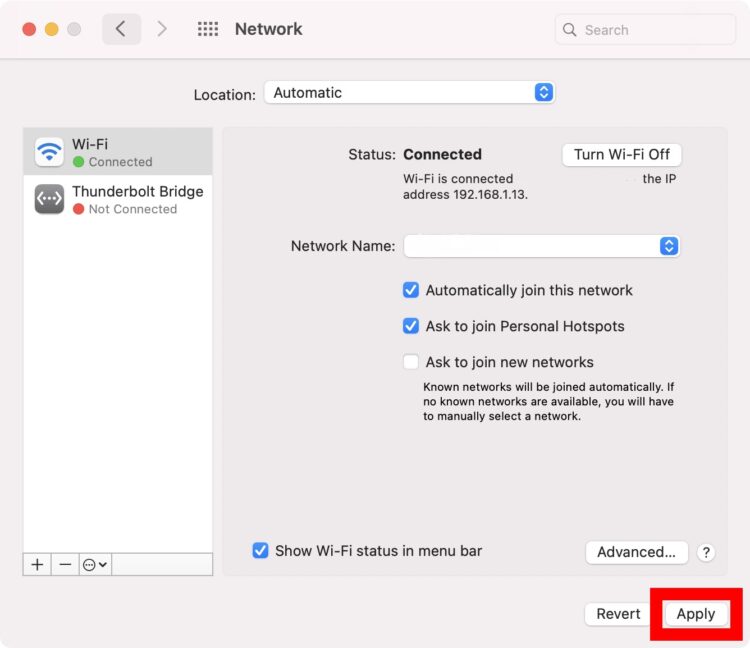
How to Change DNS Server on a Mac
Go to System Preferences > Network and change your DNS server on a Mac. Next, click on the connection you want to use and click on Advanced. The DNS tab then should select, and the plus symbol should click. Finally, click OK > Apply after entering a DNS address.
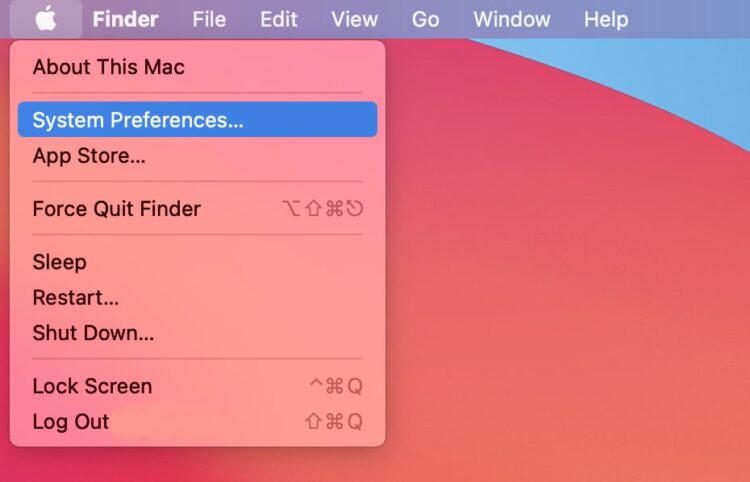
1. Tap the Apple icon in the upper-left corner of your Mac’s screen.
2. Then choose System Preferences.
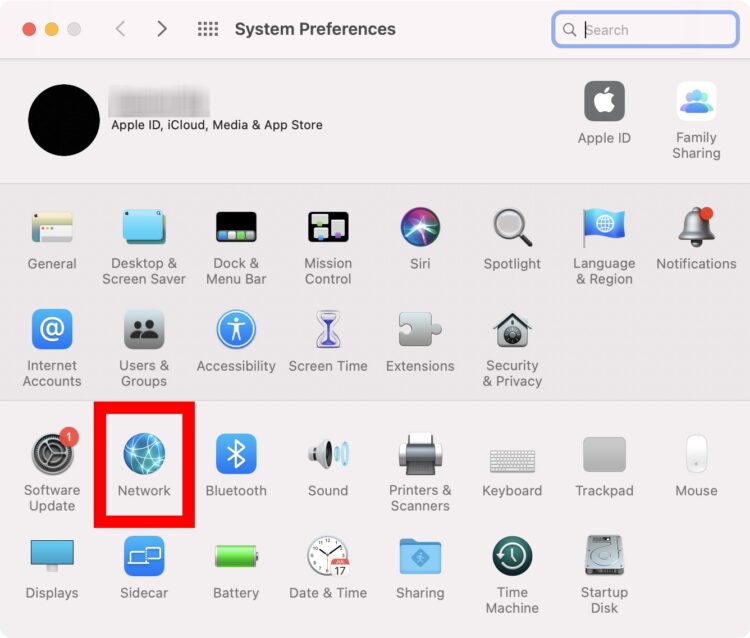
3. Next, choose Network.
4. To change the DNS server, select the connection you’d like to work with. In the left sidebar, you’ll find a list of all of your network connections. A green circle indicates an active connection, whereas a red circle indicates an inactive connection.
5. Then tap on Advanced. You’ll see this in the bottom-right corner of the window.
6. Next, tap on the DNS tab. You’ll see this at the top of the window.
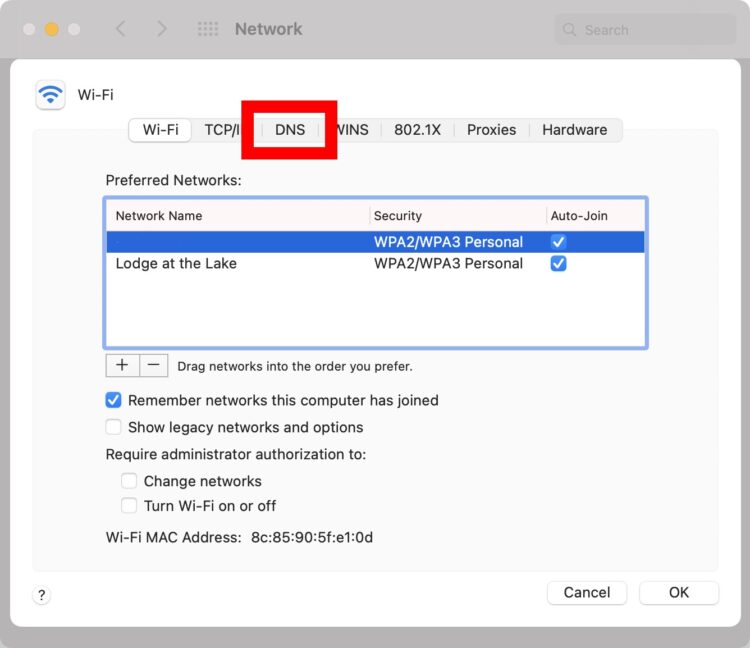
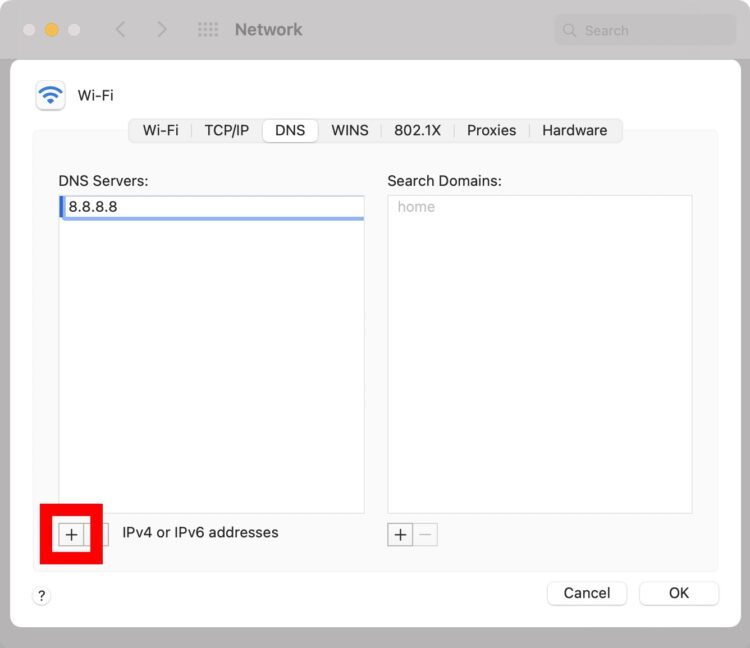
7. Tap on the plus icon (+). You’ll see this at the bottom of the DNS Servers pane.
Important: Any grayed-out items in the DNS Servers box indicate that they have already been assigned to another device, such as your wireless router. The grayed-out entries will be replaced by the new ones when you add new ones.
8. Input new DNS addresses at this point. A primary and a secondary DNS address should be entered. Your Mac will use the DNS server that appears first on your list for URLs. To go on to the next element, if no response is received, use the following syntax: Until a response is received or all servers are queried, this will continue indefinitely.
Note: You can even change the order of your DNS addresses by dragging them or tapping the minus button at the bottom of the DNS Servers box to delete any entries.
9. Next, tap OK. The Advanced window will close, and you’ll be brought back to the Network window.
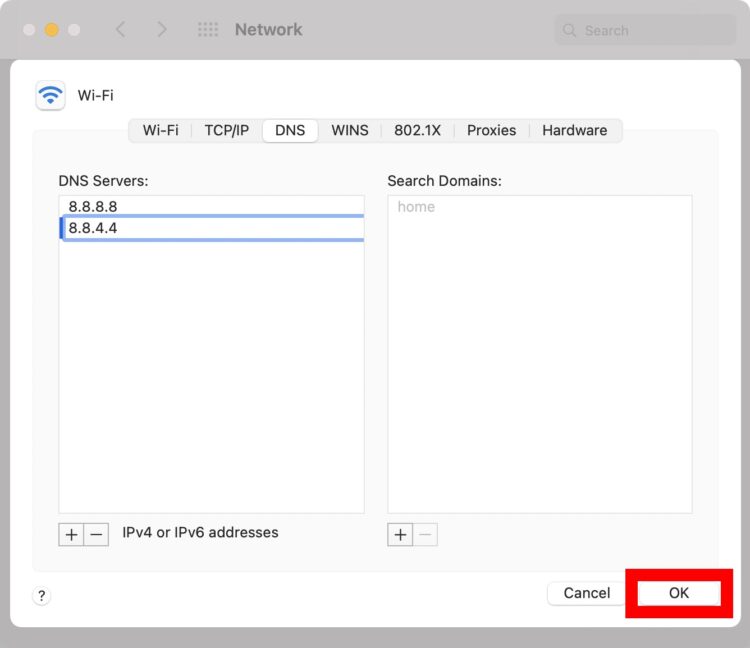
10. At last, tap on Apply. Your modifications won’t go into effect until you tap Apply in the Network window.
ALSO SEE: Guest WiFi Network
The following is a list of the top third-party DNS addresses you can use after learning how to modify your DNS address on a Windows 10 or Mac computer.
Which Third-Party DNS Server Should You Use?
The Google Public DNS, Cloudflare DNS , and OpenDNS are three of the best best DNS servers for third-party. You can use the primary and secondary DNS addresses of each of these service providers.
Google Public DNS: 8.8.8.8 and 8.8.4.4
Cloudflare: 1.1.1.1 and 1.0.0.1
OpenDNS: 208.67.222.123 and 208.67.220.123
Because it is so easy to remember, Google’s Public DNS is one of the most common addresses. The IP addresses that access Google’s servers are recorded for one to two days to aid diagnostics and troubleshooting. Google claims that it does not save any personal information. However, there may be some long-term logs. Therefore, you may wish to use a different DNS address if you’re concerned about privacy.
In addition to its speed and anonymity, Cloudflare is a popular choice. Cloudflare claims not to use or log any of your personal information. Additionally, data is deleted every 24 hours daily. To get answers to any queries, you may have concerning Cloudflare’s services, visit the company’s online forum.
If you’re looking for an experienced DNS provider, OpenDNS is a good option. Parental controls may be set up for free on the company’s website, and it automatically filters phishing sites when you visit it. You can also access up to one year of your internet activity history if you sign up for commercial service with OpenDNS.
DNS servers located in the United States make it possible to access content that could otherwise be restricted in other countries.