For various reasons, Windows 10’s built-in screenshot feature can come in handy. For example, many projects necessitate the inclusion of screenshots as part of the documentation. Because of this, Windows 10 includes its screen-capture options, as well. Some third-party screen capture software programs, on the other hand, allow for a far broader range of features. Take a Screenshots on Windows using built-in features or a third-party app.
Taking Snapshots with the Snipping Tool
Use Windows 10’s built-in Snipping Tool to grab basic screenshots in seconds. It gives you the capability to take screenshots of only certain screen areas. Using Cortana, type “Snipping Tool” in the search box. The Snipping Tool will then be opened after you’ve made your selection. Further, you can use the following combination of keys as a shortcut: Windows Key+Shift+s.
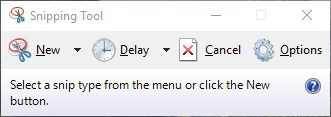
It’s a simple piece of software. First, open a menu by clicking the small arrow next to New, offering free-form Snip, Rectangular Snip, Window Snip, and Full-screen Snip. Afterward, hold down the left mouse button while dragging a rectangle across an area of the window that you want to capture, then release the mouse button. As a result, a Snipping Tool windows 10 will pop-up, as illustrated in the screenshot directly below.
Some basic settings are available here. Click Pen and pick a pen color from the drop-down menu to scribble over the image. If you prefer, you can use the Highlighter tool with the left mouse button to draw attention to a specific area. To save your screenshot, go to File > Save As.
This mode is more flexible than Rectangular Snip mode in the Snipping Tool. You may use this to create whatever kind of screenshot outline you like. As a result, you can capture photos with curved borders, although it’s not ideal for photographing windows.
Taking Full-screen Snapshots
It’s better to use the “PrtSc” key to take full-screen screenshots of the desktop or a game. First, press the PrtSc key to take a full-screen video or game screenshot. The clipboard will be saved with a full-screen screenshot. Next, press Ctrl + V to paste the screenshot into your chosen picture editing software.
You may also use Alt + PrtSc to take a Screenshot on Windows. Instead, only the currently open window is shown in the screenshot. Snapshots of selected windows can be taken using this hotkey, which does not include UI elements like the Windows taskbar. Screenshots can be taken with any following methods in Windows 10’s built-in toolset.
Third-Party Options
Taking Snapshots with ShareX
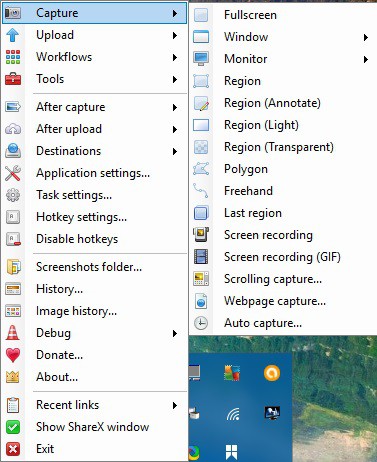
It’s fine for simple screenshots, but if you need more advanced options, Windows 10’s screen-capture tools aren’t up to the task. Instead, take a look at ShareX on Windows 10. To save and install ShareX, click Download on the ShareX home page. When ShareX is running, you may access the context menu shown below by right-clicking the ShareX system tray icon.
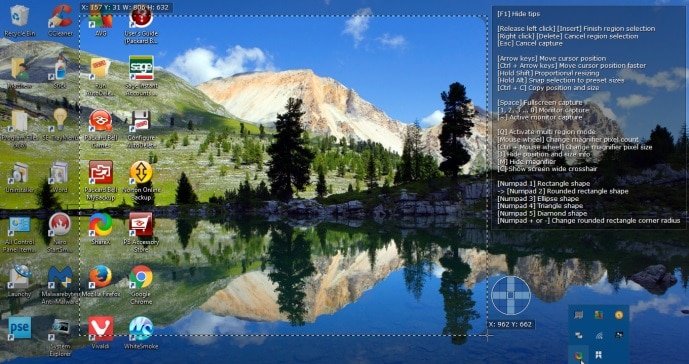
ShareX’s default hotkey is PrtSc; thus, it’s essential to be aware of it. Full-screen shots can be taken with this hotkey in the same way. In addition, the cursor will be included in the screenshots, which is not the case when using the Windows PrtSc command to take screenshots.
Snapshots can be taken in any shape, including rectangles, triangles, diamonds, and even an eclipse shape. Use the ShareX Capture menu and click Region to accomplish this. The Region tool will then appear below.
The number pad keys, one to five, can choose between different snipping forms. If you want a triangle, for instance, hit four. Then, click and hold an area on the screen with your left mouse button to take a screenshot. And, when the mouse button is let go, the taken image appears in the Greenshot window. Using ShareX’s Region tool, the image below shows an example of a diamond snapshot.

You can capture a screenshot of a software window by selecting Capture > Window from the taskbar. It brings up a submenu that lists all the open software windows you currently have running. Take a screenshot of a window by clicking on it.
Another useful ShareX feature is taking a screenshot of a whole website page:
- Open the window displayed below by selecting Webpage capture from the Region submenu.
- Take a snapshot of the page you want to include by entering its URL (web address) in the URL text field.
- By pressing the Copy button, you can take a screenshot of the website and paste it into your clipboard.

To paste the picture into Paint, press Ctrl + V.
Editing Snapshots with ShareX
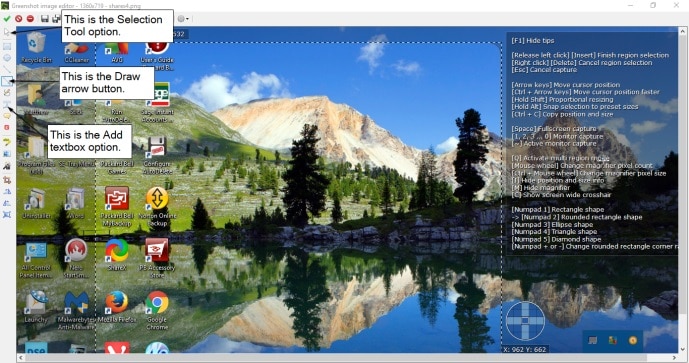
There is a wide range of editing tools available in ShareX. For example, a greenshot image editor appears below when you take a picture. It has a lot of valuable features for screenshots.

Two of the best ways to annotate screenshots on PC are text boxes and arrows. Add a textbox by clicking the Add textbox button on the toolbar and then dragging a rectangle over the photo. There are even options to change the line and fill colors on the horizontal toolbar to customize your box and font colors. To add an arrow to a snapshot, click the Draw arrow button, hold down the left mouse button, and drag the pointer. After that, a text box can be added to the image, as demonstrated in the picture just below it. Besides, you may change the position of text boxes and arrows on a screenshot by using the Selection Tool.
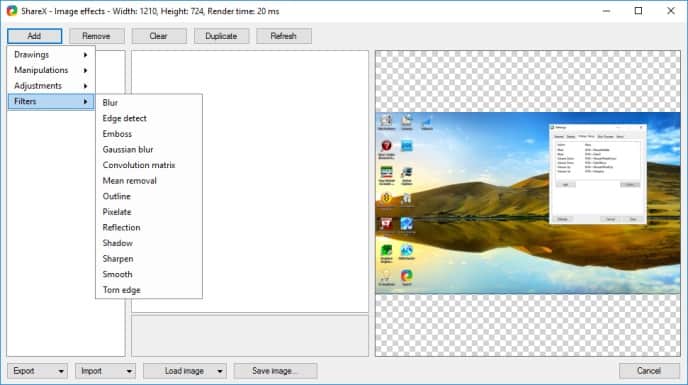
Select Tools > Image effects in ShareX’s menus and choose a screenshot to open in the editor below to modify screenshots further. To apply a variety of edits to your photos, click the Add button and then choose from Drawings, Filters, or Adjustments. For example, you can choose from the Filters sub-menu any options shown in the screenshot below.
Capture Software UI Elements in Screenshots with Snipaste
Make use of Snipaste to take Screenshots on Windows of more specific software UI elements, such as toolbars, buttons, or even the taskbar. The auto-detection of UI elements for screenshots distinguishes this screen capture software from others. You can download the Zip archive by selecting either the 64-bit or 32-bit option on this page and then decompress it using File Explorer’s Extract all command. The Snipaste icon will appear in the system tray once you run the software from the unzipped folder.
ALSO SEE: System Thread Exception Not Handled
To take a picture, click on the camera icon. Next, move the pointer to a specific UI element, such as a toolbar, tab bar, or taskbar, before clicking the Snip button. The UI element will be highlighted in a blue box below.
To confirm your decision and activate the toolbar, click the left mouse button on the image below. After that, you can choose from a variety of annotation alternatives. For example, to add some text to the snapshot, press the Text button and click inside the blue rectangle. The toolbar can also select Arrow, Marker pen, and Pencil options.
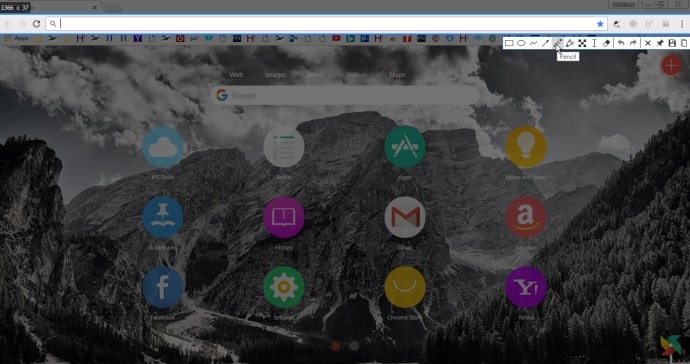
To save a screenshot of the UI, click Save to file. Alternatively, you can use the “Ctrl” + “V” hotkey to copy the text and paste it into another program. Finally, you can paste the snapshot to your desktop by clicking the F3 hotkey, as demonstrated in the screenshot below. To exit the snipping toolbar without saving the screenshot, press the Quit snipping button.

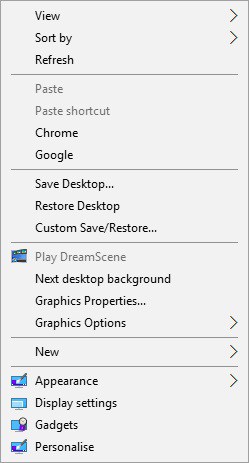
Press the Snip paste Snip hotkey to take context menus and other menus screenshots. For example, if you right-click on the Windows desktop and then press F1, you’ll get the F1 shortcut. The Snipaste tool can then capture a screenshot of the context menu, as illustrated below.
How to use the built-in tools and third-party software to take Screenshot on Windows 10? To take simple screenshots, you can use the built-in Windows 10 features. Then you may use ShareX and Snipaste to modify and save screenshots of more specific objects like UI elements or website pages.