Taking a screenshot is sometimes necessary or convenient for recording and storing information on a computer. As a result, I’ve included screenshot instructions for Windows 10 below.
How to Take Screenshots on Windows 10
Most users need to Take Screenshots in Windows 10 when trying to troubleshoot a problem on their computer with the help of an online friend, who may require a screenshot of the error message on your computer.
Moreover, taking Screenshot on PC can be helpful when you need to photograph the list of Files/folders on your computer. Or you may want to capture an image to share with family or friends or for a variety of other reasons. So, let’s take a look at some different methods for taking screenshots in Windows 10.
Take a Screenshot of the Entire Screen
Capturing your computer’s entire screen is extremely simple in Windows 10. In conjunction with the Windows or Function (FN) keys, press the dedicated Print Screen button on your computer’s keyboard (depending on your computer).
The Print Scr, PrntScr, or PrntScrn button is located on the right side of the keyboard (near the F12 key).
1. In the upper-right corner of your keyboard, press the Windows key, followed by the Print Scr key.
Note: Depending on your keyboard, the FN + Print Scr key combination or the Windows + FN + Print Scr key combination may be required. Try these combinations or consult your computer’s manual to find the correct keyboard shortcut.
2. When you press the key combination, the screen dims briefly to indicate that the entire screen has been screenshotted.
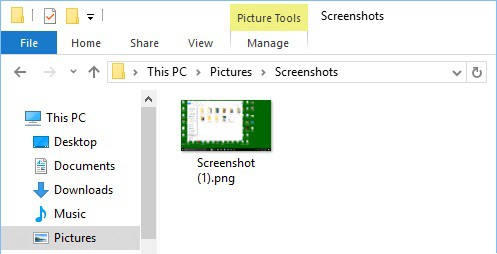
3. Navigate to This PC > Pictures > Screenshots Folder to find the screenshot of your computer’s entire screen that you just took.
Take a Screenshot of Part of Screen
The Windows 10 Creators update introduced the ability to take a screenshot of a specific screen area.
1. Press Windows + Shift + S on your computer’s keyboard. The screen will turn grey, and the cursor will change to a cross-hair pattern.
2. Click and drag the left mouse button to select the screen area you want to capture. Once the chosen area releases the Mouse Key, the screenshot of the selected area will be copied to the Clipboard.
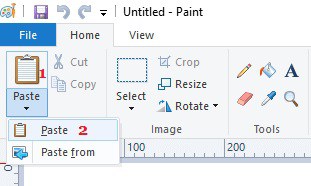
3. Open Paint and paste the screenshot by pressing Ctrl + V or choosing the Paste Icon > Paste option.
Please keep in mind that this method is not compatible with earlier versions of Windows 10.
Capture the Whole Screen to Clipboard in Windows 10
You can even copy the entire screen of your computer to the Clipboard rather than saving it to the Pictures Folder.
1. On your computer’s keyboard, press the Prnt Scr key. It will take a screenshot of the entire screen of your computer and copy it to the Clipboard.
On some keyboards, you probably need to press FN + Prnt Scr or other key combinations.
2. Then, open Paint, Word, or any other program to Paste the Clipboard data.
3. In Paint, click the Paste icon, then the Paste option in the small drop-down menu that appears.

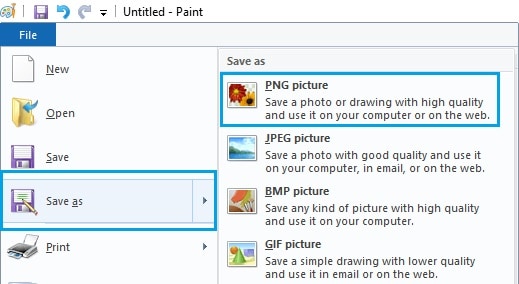
4. Afterward, go to File > Save As to save the file in PNG, JPEG, or another format.
Take a Screenshot of Active Screen in Windows 10
If you have multiple monitors connected to your computer, the Prnt Scr or Win+Prnt Scr keyboard shortcuts capture screenshots of both screens.
You can merely take a screenshot of the active screen in this case by pressing the Alt+Prnt Scr key combination. However, in this case, the screenshot copied to the Clipboard instead automatically saved in the Screenshots folder.
As a result, you’ll need to open a program like Paint, paste the screenshot, and save the file as described above.
To take a screenshot of the active screen on some computers, you may need to press Alt + Fn + Prnt Scr. Consult your laptop or computer’s manual for the correct keyboard shortcut.
Take Screenshots Using Snipping Tool
If you weren’t already aware, Windows 10 includes a built-in Snipping Tool that allows you to take screenshots of the entire screen as well as selected areas on your computer’s screen.
Moreover, you can capture screenshots with the Snipping Tool by selecting a rectangular area, a free-form area, or the entire screen. You can also annotate the screenshots with colored pens or highlighters.
The resulting screenshots or snippets can be saved to any location on your computer or emailed to friends or contacts right away.
1. Go to Start > Windows Accessories > Snipping Tool to launch the Snipping Tool.

2. In the Snipping Tool pop-up window, choose New.
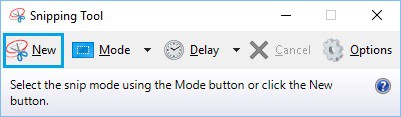
3. When you press the “New” button, the screen fades, and the mouse cursor changes to a cross-hair pattern. Holding the Mouse key and dragging the cursor around the area allows you to select the area to capture in a screenshot.
4. Release the Mouse Key after selecting the desired area, and the screenshot will be copied to the Clipboard.
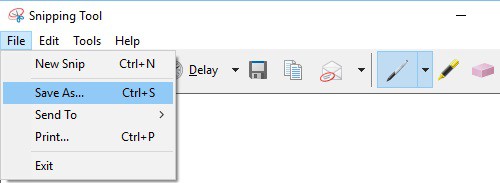
5. Next, within the Snipping Tool, go to File > Save As to save the screenshot anywhere on your computer.
Take a Screenshot in Windows 10 During Game Play
You can also use the Xbox app to take screenshots while playing Windows 10 if Game Mode is enabled on your computer. Using Windows 10’s Gaming Mode, you can capture screenshots and record Game Play Footage while playing video games on your computer.
However, in Windows 10’s settings, you must first enable the Game Bar and the option to take screenshots during gameplay.
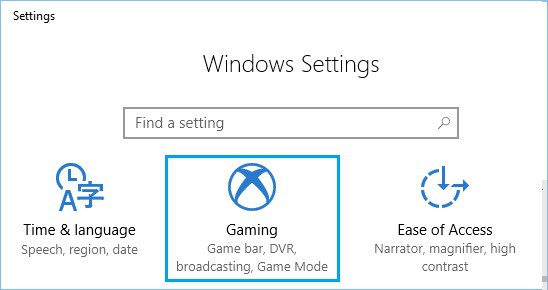
1. Navigate to Settings and choose Gaming from the drop-down menu.
2. On the next screen, in the side menu, select Game Bar and enable the option to Record Game Clips, Screenshots, and Broadcast Using Game Bar.
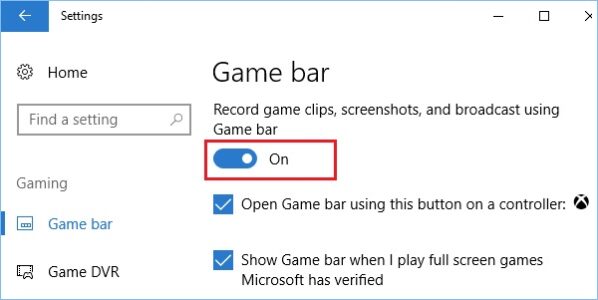
Following that, you will be able to use the Xbox app in Windows 10 to take screenshots and record gameplay clips while playing computer games.
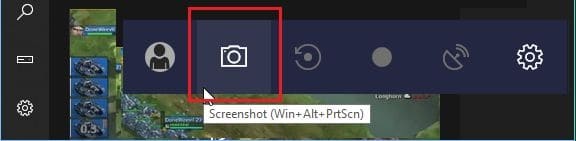
3. During gameplay, you can access the Game Bar by pressing Windows + G, and you can take screenshots by clicking on the Camera icon in the Game Bar or by pressing Windows + Alt + Prnt Scr.
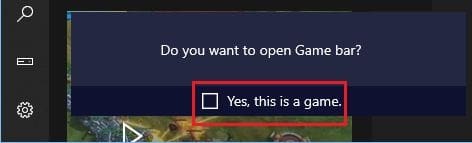
Note: Please remember that the keyboard shortcut will only function if you previously selected the “Yes, this is a game” option.
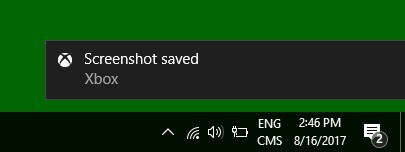
4. When you take a screenshot, you will see a “Screenshot Saved” notification, indicating that the screenshot has been saved on your computer.
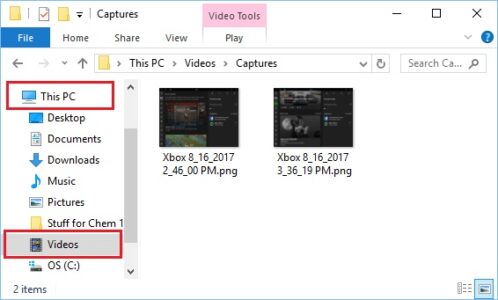
5. Navigate to the This PC > Videos > Captures folder on your computer to view the saved screenshot.
Bottom Lines
Dear Visitors, this is how to take a screenshot in Windows 10. So, if you have any issues or queries related to this post, please leave them in the comments section below!