
Windows 10 PCs with a Static IP address can be used for various purposes. First, it means your computer will have a dynamic IP address assigned to it by your router.
Moreover, remote access to your computer, using specific programs, and allowing other network users to send you files are all made more difficult as a result. So, here’s how to configure or get a static IP address for Windows 10 PC.
What Is a Static IP Address
Each computer on a network is given an IP address, a numeric identifier. Internet computers can have static or dynamic IP addresses. Static IP addresses remain constant over time, while dynamic IP addresses are those that change over time.
How Do I Assign a Static IP Address To a Device
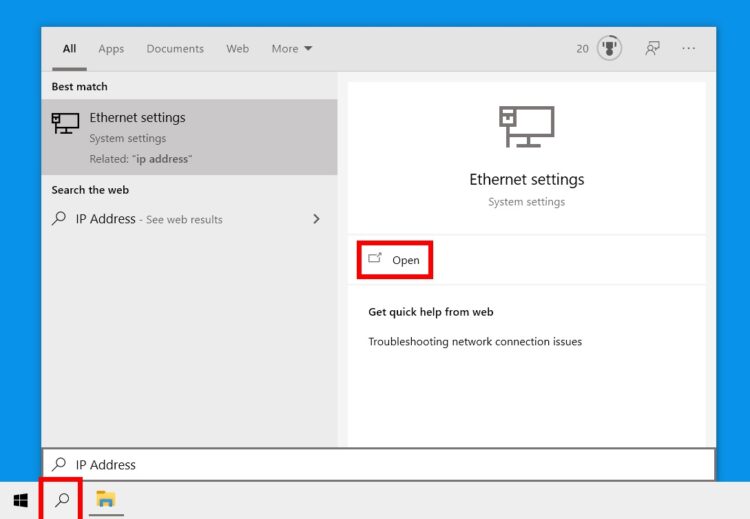
1. First, tap the magnifying glass icon in the bottom-left corner of your screen.
2. Then click IP Address into the search bar and tap Open. You can hit Enter on your keyboard if you see Ethernet settings.
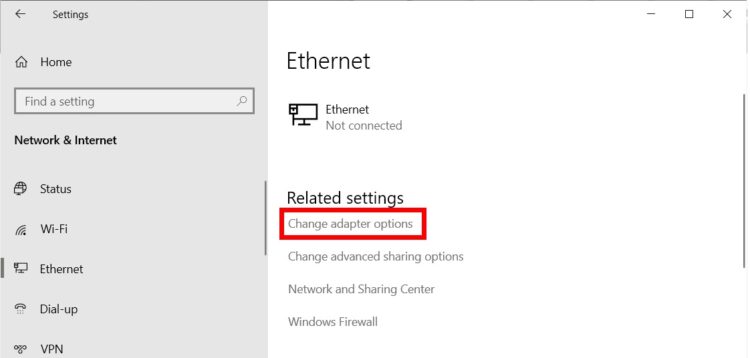
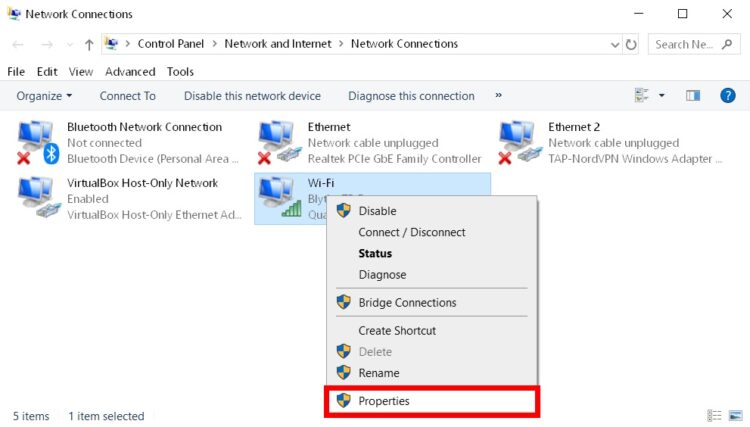
3. Then select Modify adapter settings. You’ll find it in the Related settings section. Once it is clicked, a control panel will appear.
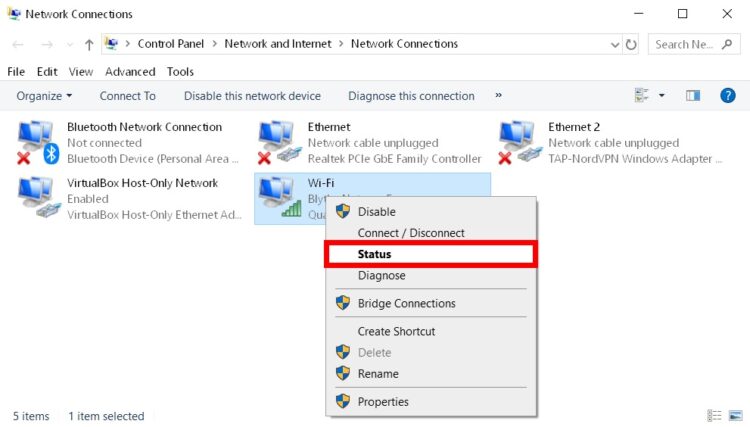
4. Next, right-tap on WiFi or Ethernet. If your computer is connected to your router through an Ethernet cable, right-tap that option. It will depend on what type of connection you’re using if your computer is connected through WiFi, right-tap that option. Further, you must be able to tell which adapter you’re using by looking at the red Xs and green bars.
5. Then choose Status.
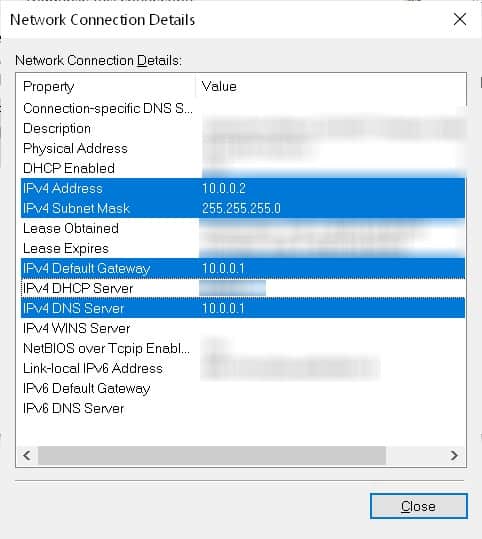
6. Next, tap Details.

7. Take note of your IPv4 address, IPv4 default gateway, IPv4 subnet mask, and IPv4 DNS server. It’s an excellent idea to write IPv4 settings Windows 10 info down, as you’ll need it later.
8. Then go back to the Network Connections window, right-tap your network, and choose Properties. Further, by exiting out of the Network Connection Details & Status windows, you can do this by tapping the X in the top-right corner.
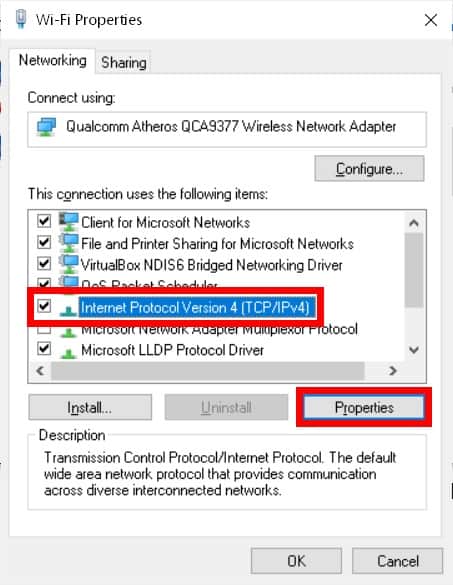
9. Next, choose Internet Protocol Version 4 (TCP/IPv4) and tap Properties.
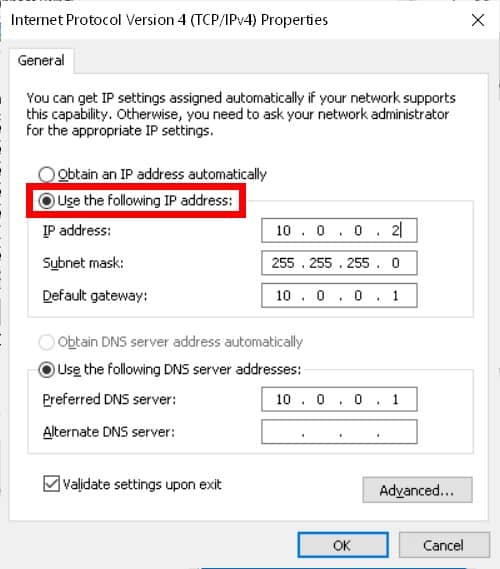
10. Then tap the radio button next to Use the following IP address.
ALSO SEE: Attachment to an Email on iPhone
11. Now, enter the static IP address, subnet mask, default gateway, & DNS server you want to use.
IP Address:
Use the first three segments of your current IP address. So, if your computer’s IP address is now 192.168.0.1, you can use an IP address that activates with 192.168.0.X, where X is any number between 1 & 254. And, if your computer’s IP address is 10.0.0.1, you can use an IP address that begins with 10.0.0.X, where X is any number between 1 and 254. But make sure you do not set your computer’s IP address to be the same as your router’s IP address.
Subnet Mask:
Normally, on a home network, the subnet mask is 255.255.255.0.
Default Gateway:
It’s your router’s IP address, or the IP address of any other gateway, as an access point
DNS Server:
You can use the numbers already entered in this field. The DNS server numbers you noticed in the Network Connection Details box can use instead if you don’t have them. Alternately, you can make use of Google’s preferred DNS servers, which are 8.8.8.8 and 8.8.4.4.
12. At last, hit OK and then close the Properties window. Your changes will not affect you until you close the WiFi/Ethernet Properties window.